|
Track and roadbed: I ordered the Marklin track that I would need from Reynauld's and Noch Merkur Ballasted Roadbed (one piece of roadbed fits one piece of track)for the track from Z.Scale.Hobo. I assembled the track when it came. Notice - assembling this little track isn't particularly easy. Maybe with practice I'll get better. However, those little rail joiners are very easily bent and ruined. I've taken what I need from some spare track, but it might be a good idea to have some extras on hand. Since none of this track comes with the power connection I soldered some wires to the track to allow me to test the track. |
|||||||||||||||||||
| I set the track into the briefcase, then used some cardboard and the padded envelope that the track came in to provide a grade at one side. I think I'll put my circus tents into the layout, which will have three levels. Most of the tents and a parking area will be at ground level. A couple more tents will be a little higher and the track will go up and around the third level. |
|||||||||||||||||||
 |
|||||||||||||||||||
| Here's a hint for anyone trying to work with trains with Marklin couplers on a small layout without much straight-away: Keep something like a small jeweler's screwdriver on hand to allow you to push the couplers to one side. The couplers don't mesh very well by themselves, especially when most of the track is curved and the little screwdriver can be used to push the couplers to one side or the other since your finger won't fit between the cars. |
|||||||||||||||||||
| The Merkur Ballasted Roadbed (one piece - curved or straight - per piece of track) comes as pieces of 1/8-inch thick foam about 4 1/2-inches long by 1 1/2-inches wide and covered with fine particles of "ballast". Each piece of track is pressed down into the empty spaces. | |||||||||||||||||||
 |
|||||||||||||||||||
|
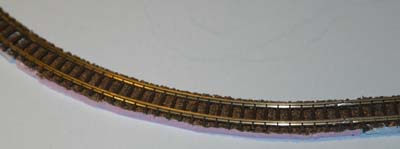
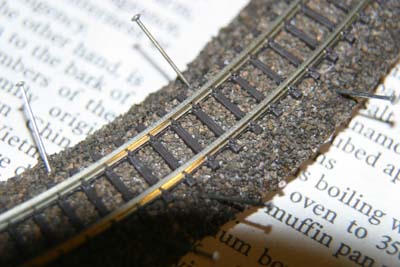
Prior to pressing the track and roadbed together I trimmed each piece of roadbed to slightly larger than I thought would be needed (about 1/8-inch leeway on each side). I then pressed the track and roadbed together and trimmed the roadbed to fit the track width. Each piece of roadbed comes with a couple beveled pieces of ballasted foam. I trimmed off the level section of each piece and glued them to the sides of the roadbed using Noch "Merkur Special Glue." These were held in place by "dressmaker pins" until dry, as seen in the picture to the right. The lower picture shows a close-up of the Marklin track on the completed roadbed as the glue was drying. |
|||||||||||||||||||
 |
|||||||||||||||||||
 |
|||||||||||||||||||
 |
|||||||||||||||||||